|
This post may contain affiliate links, which means that we may receive a commission if you make a purchase using these links. As an Amazon Associate, we earn commission from qualifying purchases.
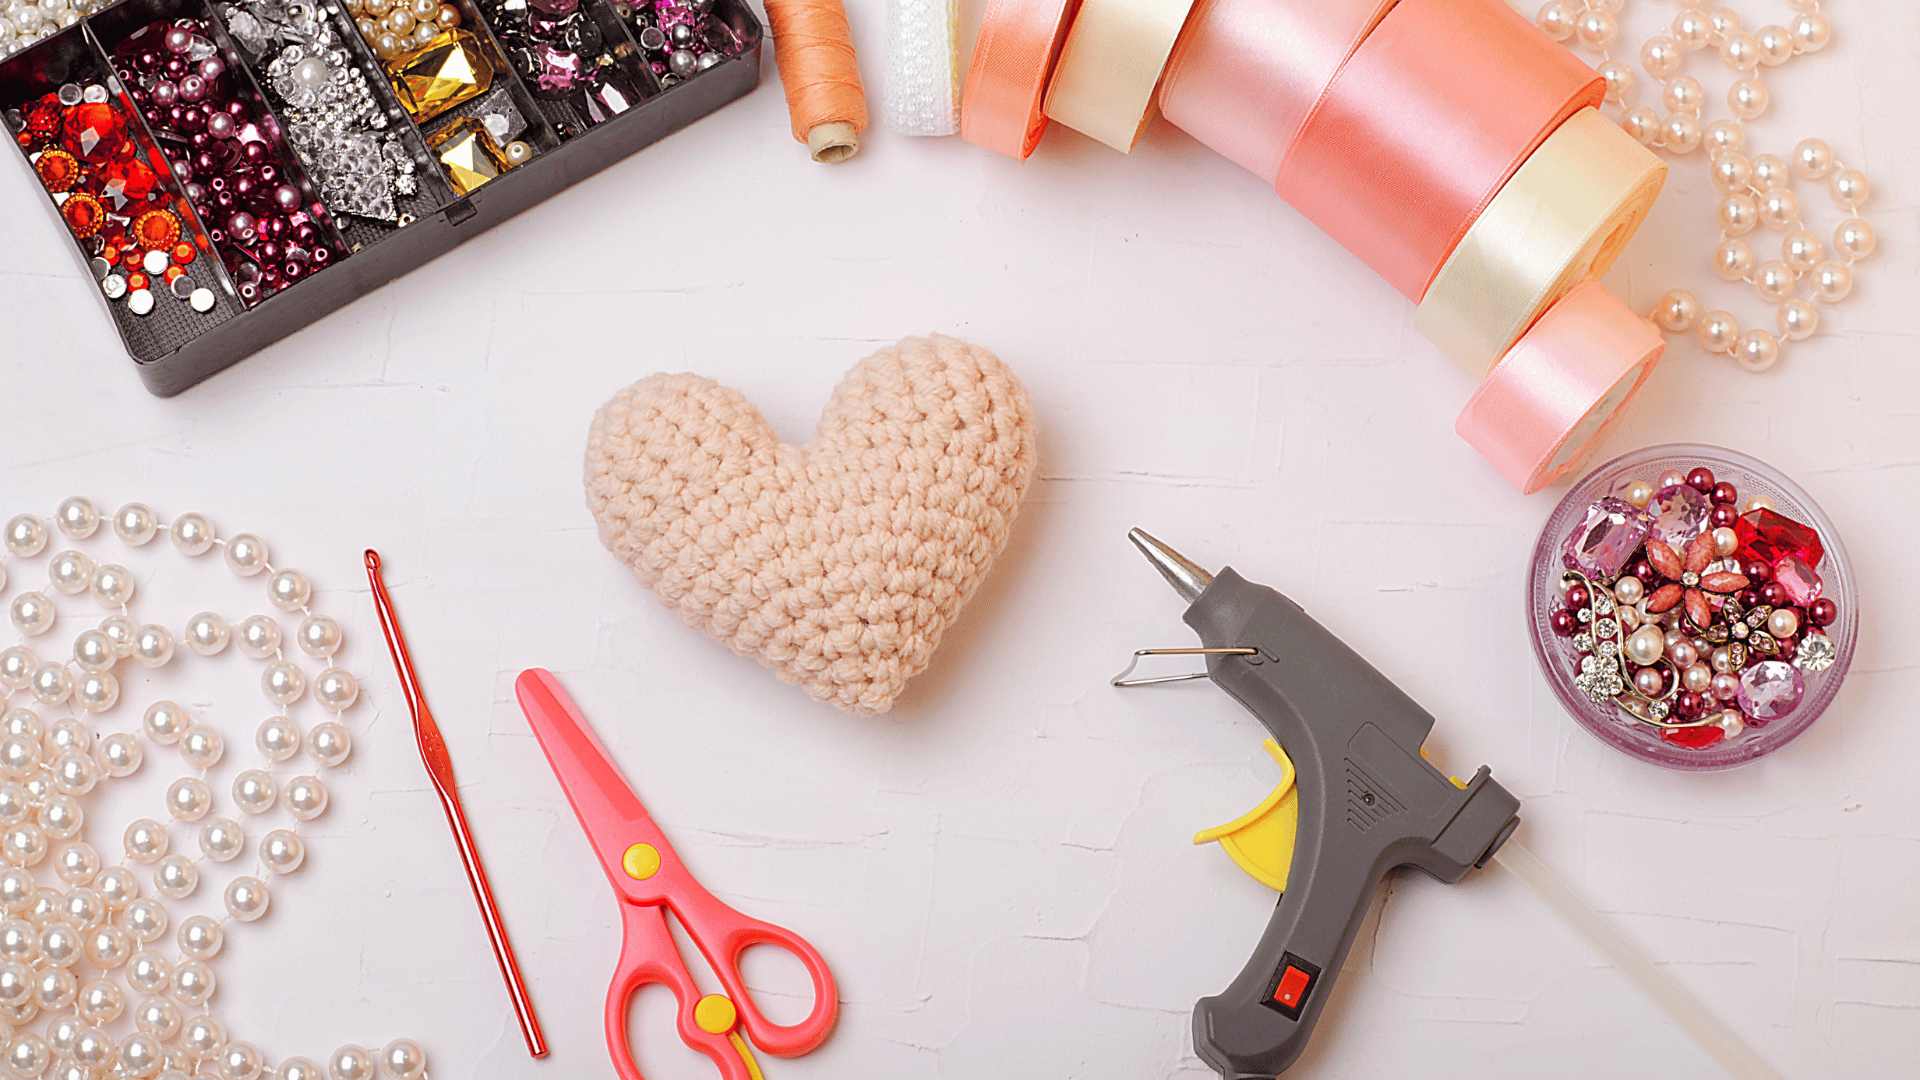
There’s something undeniably cozy about the pitter-patter of raindrops against the window, isn’t there? On those dreary, rainy days when going outside seems less than appealing, why not indulge in some creative DIY craft projects to brighten up your day?
Crafting isn’t just about creating beautiful objects; it’s also a therapeutic outlet for self-expression and relaxation. So, grab your crafting supplies and let’s dive into 10 creative DIY craft projects perfect for a rainy day.
Table of Contents
Project 1: Handmade Bookmarks
Handmade bookmarks are a delightful and practical DIY craft that allows you to express your creativity while enhancing your reading experience.
Crafting bookmarks by hand provides an opportunity to infuse personal flair and style into an otherwise mundane item. These bookmarks not only serve as placeholders in books but also as charming accessories that reflect the maker’s personality and artistic vision.
One of the joys of creating handmade bookmarks is the endless array of materials that can be used. From colorful paper and cardstock to fabric scraps, ribbons, beads, and even pressed flowers, the possibilities are limited only by one’s imagination. Crafters can experiment with different textures, patterns, and embellishments to craft bookmarks that are uniquely their own.
The process of making handmade bookmarks can be as simple or as intricate as desired. Beginners might opt for straightforward designs like origami corner bookmarks or ribbon-tied bookmarks, while more experienced crafters might delve into techniques such as embroidery, decoupage, or quilling. Regardless of the chosen method, each handmade bookmark is a labor of love, imbued with the care and attention of its creator.
Beyond their aesthetic appeal, handmade bookmarks also make thoughtful and heartfelt gifts for friends and family. Whether celebrating a birthday, holiday, or simply expressing gratitude, a handmade bookmark carries with it a personal touch that is sure to be appreciated. Furthermore, engaging in the art of bookmark-making can be a therapeutic and fulfilling activity, offering a welcome break from the hustle and bustle of daily life.
In essence, handmade bookmarks are not just practical accessories for readers but also artistic expressions of creativity and sentiment. Through this simple craft, individuals can add a touch of beauty and individuality to their reading routines, making each literary journey all the more enjoyable.
Project 2: Painted Rock Art
Next, let’s channel our inner artist with painted rock art. Painted rock art, also known as rock painting, is a captivating DIY craft that merges artistic expression with natural beauty.
It involves transforming ordinary rocks into miniature works of art through the application of paint, markers, and other embellishments. This creative endeavor not only allows individuals to unleash their imagination but also offers a unique way to connect with nature and spread joy within communities.
One of the most appealing aspects of painted rock art is its accessibility. Rocks of various shapes and sizes can be easily sourced from outdoor environments such as beaches, riverbanks, or even one’s backyard. These humble canvases serve as a blank slate for endless artistic possibilities, inviting creators of all ages and skill levels to participate in the craft.
The process of painting rocks is both therapeutic and meditative, providing a calming escape from the stresses of daily life. Artists can experiment with different painting techniques, color combinations, and themes, whether it’s whimsical characters, intricate patterns, inspirational quotes, or realistic landscapes. Each rock becomes a tiny masterpiece, infused with the personality and creativity of its maker.
Beyond personal enjoyment, painted rock art often takes on a communal aspect as well. Many enthusiasts participate in rock hiding and hunting activities, where painted rocks are hidden in public spaces for others to discover.
This interactive aspect fosters a sense of connection and surprise within communities, as individuals stumble upon these hidden treasures during their daily routines. Additionally, social media platforms often serve as hubs for sharing painted rock creations, allowing artists to showcase their work and inspire others around the world.
In essence, painted rock art is a delightful fusion of creativity, nature, and community. Through this simple yet impactful craft, individuals can unleash their artistic talents, find solace in the act of creation, and spread joy to others in unexpected ways. Whether painting rocks for personal enjoyment or as part of a shared activity, the beauty of painted rock art lies in its ability to bring a touch of magic to everyday life.
Project 3: Paper Flower Bouquet
Crafting a paper flower bouquet is a delightful DIY project that allows you to bring the beauty of nature indoors while showcasing your creativity and craftsmanship. Unlike fresh flowers, paper flowers offer the advantage of longevity, making them a lasting and meaningful alternative for special occasions or everyday decor.
From vibrant roses and delicate lilies to whimsical daisies and exotic orchids, the possibilities for paper flower designs are endless, limited only by imagination and skill.
One of the joys of creating paper flower bouquets is the wide variety of materials and techniques that can be employed. Crafters can choose from an array of colorful paper types, including crepe paper, cardstock, tissue paper, and even recycled materials, each offering its own unique texture and aesthetic.
Additionally, various crafting techniques such as origami, quilling, and paper sculpting can be utilized to bring these blooms to life, allowing for a diverse range of flower shapes, sizes, and styles.
The process of crafting paper flowers requires patience, attention to detail, and a love for precision. Each petal is meticulously cut, shaped, and assembled, with careful consideration given to color coordination and composition.
Despite the intricate nature of the craft, it offers a deeply rewarding experience as creators witness their creations blossom into lifelike representations of their botanical counterparts.
Paper flower bouquets are not only exquisite decorations but also thoughtful gifts for loved ones. Whether celebrating a birthday, anniversary, wedding, or other special occasions, a handmade paper flower bouquet carries with it the sentiment of time, effort, and care invested in its creation.
Furthermore, paper flower crafting provides a sustainable and eco-friendly alternative to traditional floral arrangements, allowing individuals to enjoy the beauty of flowers without the environmental impact of fresh blooms.
In essence, crafting a paper flower bouquet is a celebration of creativity, craftsmanship, and the enduring beauty of nature. Through this DIY craft, individuals can express their artistic talents, brighten spaces with handmade blooms, and spread joy to those around them.
Whether adorning a tabletop, brightening a room, or serving as a heartfelt gift, a paper flower bouquet is a timeless symbol of love, creativity, and craftsmanship.
Project 4: Upcycled Jar Lanterns
When you delve into the world of upcycling jar lanterns, you embark on a journey of creativity and sustainability. Transforming ordinary jars into enchanting lanterns not only breathes new life into discarded materials but also adds a touch of warmth and ambiance to any space.
With just a few simple materials and a dash of imagination, you can turn empty jars into charming luminaries that illuminate your surroundings with a soft, inviting glow.
Start your upcycling adventure by gathering a collection of glass jars of various sizes and shapes. Whether it’s a mason jar, a jam jar, or even a baby food jar, each vessel holds the potential to become a beautiful lantern. Clean the jars thoroughly and remove any labels or sticky residue to create a clean canvas for your creativity to shine.
Next, let your imagination take flight as you envision the design for your jar lanterns. From rustic chic to bohemian flair, the possibilities are endless. You might choose to adorn your jars with colorful tissue paper decoupage, intricate lace overlays, or whimsical painted designs. Alternatively, consider embellishing them with natural elements like twine, feathers, or dried flowers for a touch of organic charm.
Once you’ve settled on a design, it’s time to bring your vision to life. Gather your chosen materials, whether it’s paint, glue, decorative paper, or other crafting supplies, and set to work transforming your jars into works of art. Take your time as you carefully apply each layer, allowing your creativity to guide you as you bring your lanterns to fruition.
As your jar lanterns take shape, you’ll feel a sense of satisfaction knowing that you’ve given new purpose to items that might have otherwise been discarded.
Whether you hang them from trees in your garden, place them on your patio table, or use them to illuminate a cozy indoor nook, your upcycled jar lanterns will infuse your space with warmth, charm, and a touch of eco-friendly style. So gather your jars, unleash your creativity, and let the magic of upcycling light up your world.
Project 5: Embroidered Hoop Art
If you’re looking for a craft project that’s as relaxing as it is rewarding, try your hand at embroidered hoop art. Embroidering hoop art opens up a world of creative possibilities, inviting you to explore the timeless art of needlework in a modern and imaginative way.
With just a few simple materials – an embroidery hoop, fabric, thread, and a needle – you can create stunning pieces of art that add a personal touch to your home decor or make heartfelt gifts for loved ones.
Start your embroidered hoop journey by selecting a design that speaks to you. Whether it’s a delicate floral motif, a whimsical animal illustration, or a meaningful quote, choose a pattern that resonates with your style and aesthetic. You can find countless patterns online or draw inspiration from nature, literature, or your own imagination.
Once you’ve chosen a design, secure your fabric in the embroidery hoop, ensuring it’s taut and wrinkle-free. Then, thread your needle and begin stitching, allowing your creativity to guide you as you bring your design to life. Experiment with different embroidery stitches – from basic backstitch and satin stitch to more intricate techniques like French knots and chain stitch – to add texture, depth, and visual interest to your artwork.
As you embroider, you’ll find yourself immersed in the meditative rhythm of stitching, losing track of time as you watch your design take shape one stitch at a time. Whether you’re a seasoned embroiderer or a novice crafter, the process of creating embroidered hoop art is both relaxing and rewarding, offering a welcome escape from the hustle and bustle of daily life.
Once your embroidery is complete, trim any excess fabric and admire your handiwork. Whether you display your hoop art on a gallery wall, hang it in a cozy corner of your home, or gift it to a friend, each embroidered hoop is a labor of love, imbued with the care and attention of its creator. So pick up your needle and hoop, and let your imagination soar as you stitch your way to beautiful works of art.
Project 6: Homemade Bath Bombs
Treat yourself to a luxurious spa experience with homemade bath bombs. Crafting homemade bath bombs opens up a world of relaxation and indulgence, inviting you to create luxurious spa experiences right in the comfort of your own home. With just a few simple ingredients – baking soda, citric acid, Epsom salts, essential oils, and a touch of water – you can whip up delightful bath bombs that fizz, bubble, and release intoxicating aromas, transforming your bath into a soothing oasis of calm.
Start your DIY bath bomb adventure by gathering your ingredients and equipment. Mix together the dry ingredients – baking soda, citric acid, and Epsom salts – in a bowl, ensuring they are thoroughly combined. Then, add a few drops of your favorite essential oils to infuse your bath bombs with heavenly scents like lavender, eucalyptus, or citrus.
Next, it’s time to add the water, but proceed with caution – too much water can activate the fizzing reaction prematurely. Use a spray bottle to gradually mist the water onto the dry ingredients, mixing as you go, until the mixture reaches a sandy texture that holds together when squeezed in your hand. This step requires patience and precision, so take your time and add water slowly to achieve the perfect consistency.
Once your bath bomb mixture is ready, it’s time to mold it into shape. You can use specialized bath bomb molds for perfectly round bombs, or get creative with silicone molds, cookie cutters, or even muffin tins for unique shapes and sizes. Pack the mixture tightly into the molds, pressing firmly to ensure they hold their shape.
After letting your bath bombs dry and harden for at least 24 hours, they’re ready to use. Drop one into a warm bath and watch as it fizzes and dissolves, releasing its fragrant oils and skin-nourishing ingredients into the water. Sink into the luxurious bubbles, close your eyes, and let the stresses of the day melt away as you indulge in a spa-worthy soak, courtesy of your homemade bath bombs.
Project 7: Fabric Scrap Keychains
Creating fabric scrap keychains offers a delightful way to repurpose leftover fabric scraps and add a personal touch to your everyday accessories. Dive into this DIY project, and you’ll find yourself transforming seemingly insignificant remnants into charming and practical keychains that reflect your unique style and creativity. With just a few materials – fabric scraps, keychain hardware, and basic sewing supplies – you can craft one-of-a-kind accessories that make perfect gifts or add a pop of color to your own keyring.
Start your fabric scrap keychain adventure by raiding your fabric stash for colorful scraps of various textures and patterns. Whether it’s scraps from sewing projects, old clothes, or leftover pieces from previous crafts, gather an assortment of fabrics that inspire you. Mix and match different colors and prints to create eye-catching combinations, or stick to a cohesive color scheme for a more polished look.
Next, it’s time to cut your fabric scraps into strips or shapes that are suitable for keychain making. You can experiment with different sizes and shapes – from narrow strips to geometric shapes like circles or rectangles – depending on your preferences and the available materials. Embrace the imperfections of each fabric scrap, as they add character and whimsy to your finished keychains.
Once you’ve cut your fabric scraps to size, it’s time to assemble your keychains. Attach a keychain ring to each fabric piece using basic sewing techniques like hand-stitching or machine sewing. You can also add embellishments like beads, buttons, or embroidery to further personalize your keychains and add visual interest.
As you create your fabric scrap keychains, you’ll find yourself immersed in the creative process, enjoying the meditative rhythm of sewing and the satisfaction of giving new life to old materials. Whether you keep them for yourself or give them as gifts, these handmade keychains are a testament to your resourcefulness, creativity, and love for crafting. So gather your fabric scraps, unleash your imagination, and let the magic of DIY keychain making brighten up your day.
Project 8: Miniature Terrariums
Bring a little piece of the outdoors inside with miniature terrariums. Crafting miniature terrariums opens up a captivating world of greenery and creativity, inviting you to create tiny ecosystems that bring a touch of nature into your living space.
With just a few simple materials – a glass container, soil, small plants, and decorative elements – you can design enchanting miniature landscapes that add charm and tranquility to any room. Dive into this DIY project, and you’ll find yourself embarking on a journey of discovery as you assemble and nurture your own miniature worlds.
Start your miniature terrarium adventure by selecting a glass container that suits your vision. Whether it’s a clear glass jar, a vintage apothecary bottle, or a geometric terrarium, choose a vessel that allows you to showcase your miniature landscape while providing ample space for your plants to thrive. Consider the size and shape of the container as well as its transparency, as these factors will influence the overall aesthetic of your terrarium.
Next, gather your materials and prepare the foundation for your miniature landscape. Begin by layering the bottom of your container with small rocks or pebbles to create drainage and prevent waterlogging. Then, add a layer of activated charcoal to help keep the terrarium fresh and prevent odors. Finally, top it off with a layer of potting soil, ensuring there’s enough depth for your plants’ roots to spread and grow.
Now comes the fun part – planting your miniature terrarium! Select small plants that are well-suited to the conditions inside your container, such as succulents, cacti, ferns, or mosses. Arrange the plants in your terrarium, taking care to space them out evenly and consider their growth habits. You can also add decorative elements like miniature figurines, stones, or driftwood to enhance the visual appeal of your miniature landscape.
As you assemble your miniature terrarium, you’ll find yourself captivated by the process of creating a tiny world within the confines of a glass container. Each plant and decorative element you add adds depth and personality to your miniature landscape, turning it into a miniature oasis of tranquility and beauty.
Whether you place it on a windowsill, desk, or coffee table, your DIY miniature terrarium will serve as a charming reminder of the wonders of nature and your own creativity. So gather your materials, unleash your imagination, and let the magic of miniature gardening transport you to a world of greenery and serenity.
Project 9: Handwritten Quote Art
Get inspired with handwritten quote art. Creating handwritten quote art offers a delightful way to infuse your space with inspiration and personal flair, inviting you to combine the power of words with the beauty of handwritten calligraphy.
With just a pen, paper, and your favorite quotes, you can craft unique and meaningful artworks that reflect your values, aspirations, and personality. Dive into this DIY project, and you’ll find yourself immersed in the art of lettering as you bring words to life through your own hand.
Start your handwritten quote art adventure by selecting a quote that resonates with you. Whether it’s a timeless piece of wisdom, a line from your favorite book or song, or a mantra that inspires you, choose words that speak to your heart and soul. Write out the quote in your own handwriting, experimenting with different styles, sizes, and layouts to find the perfect expression of your chosen words.
Next, gather your materials and prepare your canvas. You can use a blank sheet of paper, a journal, a canvas board, or even a chalkboard – the choice is yours. Consider the size and format of your canvas as well as the tools you’ll use for writing, whether it’s a traditional pen or brush pens for calligraphy.
As you begin to write out your quote, take your time and savor the process of lettering each word. Pay attention to spacing, alignment, and the flow of your strokes, allowing your handwriting to convey the emotion and meaning behind the words. Experiment with different fonts, embellishments, and flourishes to add visual interest and personality to your quote art.
As you create your handwritten quote art, you’ll find yourself immersed in the therapeutic rhythm of writing and the joy of bringing words to life on paper. Each stroke of the pen is a testament to your creativity and passion for self-expression, turning simple words into works of art that inspire and uplift.
Whether you display your quote art on a gallery wall, frame it as a gift for a friend, or tuck it into your journal as a reminder to yourself, your handwritten quote art serves as a beautiful reflection of your innermost thoughts and dreams. So gather your pens, unleash your imagination, and let the magic of handwritten lettering transform your words into art.
Project 10: Tie-Dye T-Shirts
Last but not least, unleash your creativity with tie-dye t-shirts. Diving into tie-dye t-shirt DIY projects invites you into a world of vibrant colors and endless creativity, where you have the opportunity to transform ordinary plain shirts into bold and eye-catching fashion statements.
With just a few supplies – plain t-shirts, fabric dye, rubber bands, and a splash of imagination – you can unleash your inner artist and craft personalized garments that reflect your unique style and personality.
Start your tie-dye adventure by selecting your canvas – plain cotton t-shirts work best for absorbing the dye and achieving vibrant results. Choose shirts in your preferred size and style, whether it’s a classic crew neck, a trendy crop top, or a relaxed oversized fit. Lay out your shirts on a flat surface and gather your dye colors, opting for a palette that inspires you and complements your wardrobe.
Next, it’s time to get creative with your tie-dye designs. Use rubber bands to gather and bind sections of the shirt, creating unique patterns and shapes. Experiment with different folding techniques like accordion folds, spiral patterns, or random scrunching to achieve a variety of effects. You can also use items like marbles, rubber bands, or string to create resist patterns and textures.
Once you’ve prepared your shirts, it’s time to apply the dye. Mix your dye according to the manufacturer’s instructions and apply it to the shirt, saturating each section with your chosen colors. Don’t be afraid to layer and blend different colors to create depth and dimension in your designs. After applying the dye, wrap the shirts in plastic wrap or place them in plastic bags to allow the colors to set and intensify.
As you wait for your tie-dye creations to set, you’ll feel a sense of anticipation and excitement, eager to see the results of your artistic efforts. After a few hours, rinse out the excess dye from your shirts until the water runs clear, then remove the rubber bands and unfold your creations to reveal the stunning tie-dye patterns underneath.
Whether you opt for bold swirls, psychedelic spirals, or subtle gradients, each tie-dye shirt is a wearable work of art that celebrates your creativity and individuality. So gather your supplies, unleash your imagination, and let the magic of tie-dye transform your plain t-shirts into colorful masterpieces.
Conclusion
Rainy days may keep us indoors, but they also offer the perfect opportunity to unleash our creativity and indulge in some DIY crafting. Whether you’re painting rocks, crafting paper flowers, or whipping up homemade bath bombs, these 10 creative DIY craft projects are sure to brighten up even the gloomiest of days.
So, next time the rain clouds roll in, grab your crafting supplies and let your imagination run wild. After all, there’s nothing quite like the joy of creating something beautiful with your own two hands.
0 Comments